QuickBooks Helpsheets – Creating a new invoice
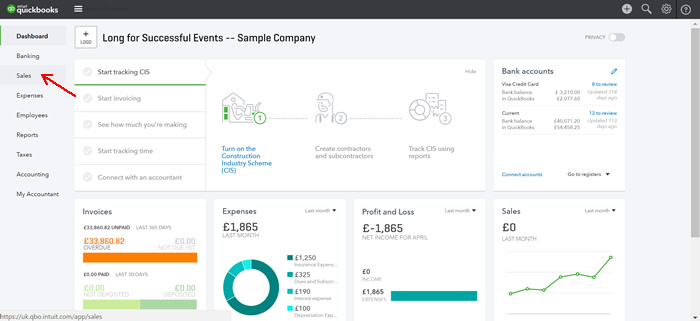
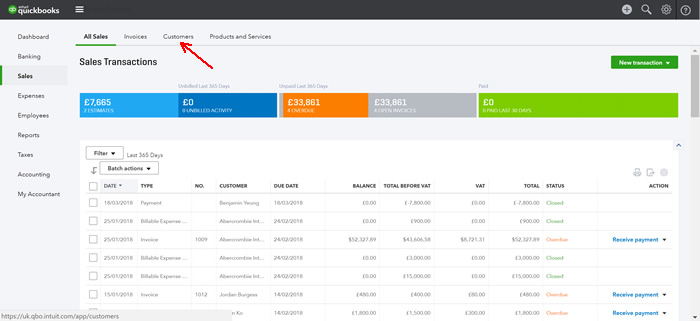
- Once logged into QBO, click on “Sales” on the left-hand side and then click on the “Customers” tab.
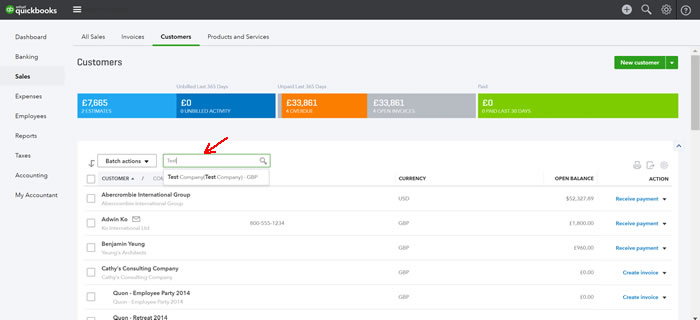
- In the Customer home screen, you can either scroll through the list to find the customer you wish to invoice or start typing the name of the customer in the search bar and choose the correct customer from the drop down.
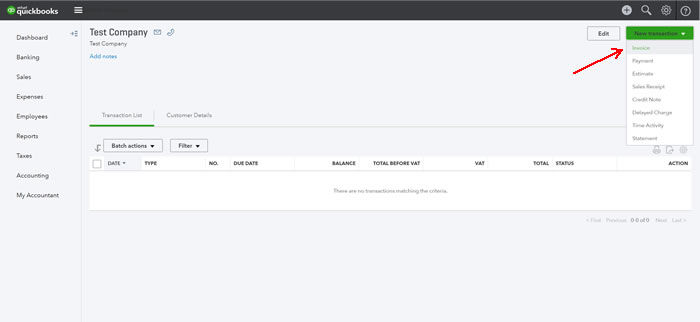
- Once in the “Customer” window, click the drop-down arrow for the Green Button on the top right-hand corner of the screen and choose “Invoice”. You can also scroll through the customer list and click the drop-down arrow beside the Customer name and choose “Creative Invoice” or if it shows “Create Invoice” click on that.

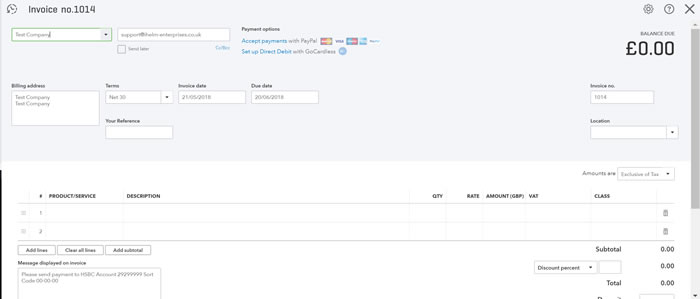
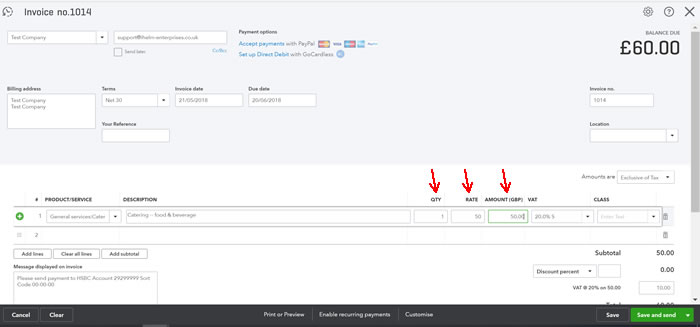
- In the Invoice screen you can edit any of the fields that are displayed – e-mail, billing address, terms and invoice date. The due date field will automatically update based on the terms and invoice date.
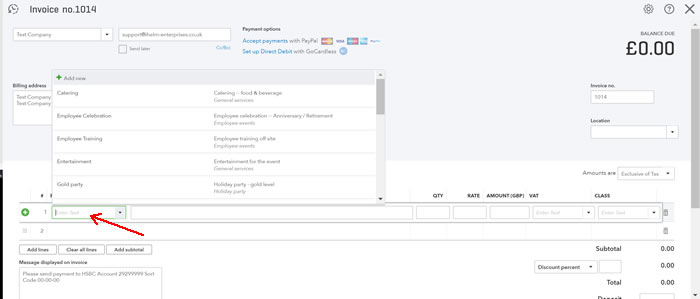
- In the Product/Service column, you can choose a service from the drop down or start typing the service you wish to use and click on it.
- In the description column enter details of the services provided.
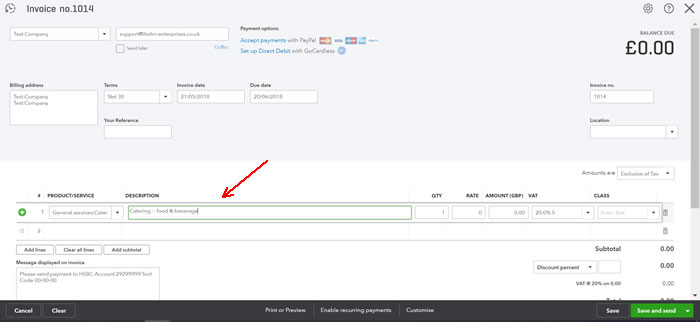
- Enter the Qty & Rate, or the total amount in the Amount column. You can add more lines to the invoice and so invoice for different services on one invoice.
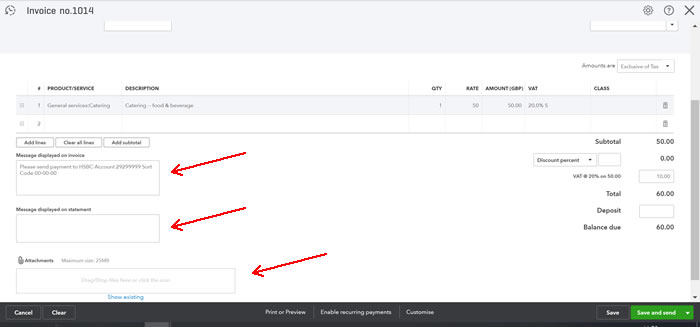
- You can edit the default message displayed on the invoice if necessary. You can also add a statement memo and even attachments like time sheets.
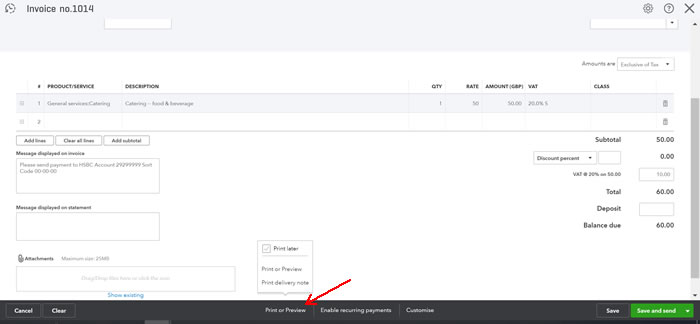
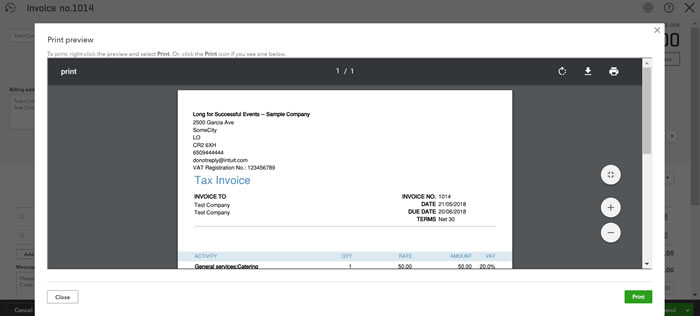
- To view the invoice the client will see, click on “Print or Preview” and choose “Print or Preview”. This loads a window that displays the invoice the customer sees. You can then Print the invoice, Close the window or get the link for the invoice. Once you have finished click “Close”.
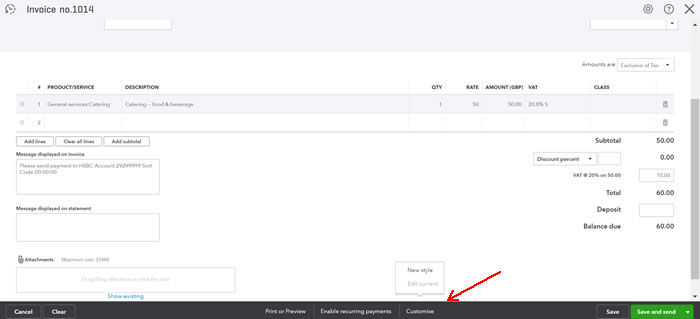
- You can customise the invoice based on any templates you have created by clicking “Customise”. You can also create new templates for Edit the current one.
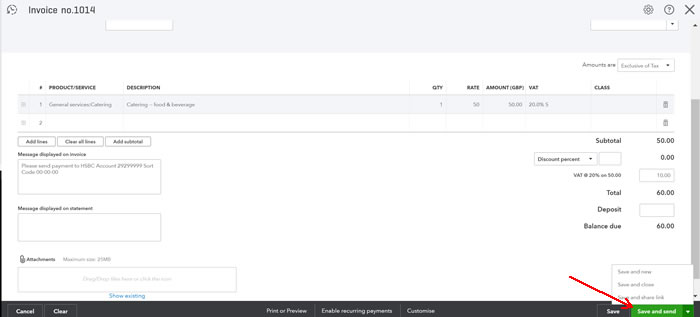
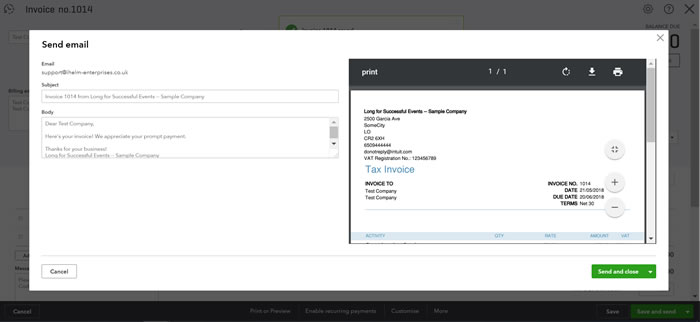
- When you are ready to send the invoice, you can choose “Save & Send” by clicking the arrow on the Green button on the bottom right of the screen. This opens a window where you can see the invoice, as well as the e-mail that will be sent to the customer. You can change the wording for the e-mail. Once you are happy with the e-mail, simply click “Send and Close”.
Email info@ihelm-enterprises.co.uk


